3.03.2011

Preserving memories


We all have them...a box of old photos, a drawer with ticket stubs and dated birthday cards, a yellowed envelope with a faded address...mementos of past events.

What to do with them...how to save them...what's important...who will care...when will I have the time...

I have been working on a project for a friend over the last couple of months...she had lots of "stuff" that she wanted preserved somehow...would I be willing to make a collage using her "stuff"...it certainly seemed right up my alley...I said yes.

There was a lot of stuff...just sorting through all of it took some time.  And as I sorted, I developed a plan...it wasn't going to be possible to have just one collage...so instead I opted for several collages, each with its own mini-theme and composition.  The finished collages could all be hung together or in whatever groupings the friend wanted.

As is my style, I've been incorporating more than just paper into the collages...I think that there's more depth and interest when other objects are included...
I encourage you to take out those old photos and dig up those dated birthday cards and do something with them...it doesn't need to be a grand work of  art.  As I was sorting through the piles of my friend's stuff, I found it made sense to organize by theme and by color.  You can't go wrong if you use at least one of these elements as a commonality - form, function, color or theme.  Then put your collage together...I used inexpensive canvas frames for the foundation and primarily used Elmer's glue as the adhesive.

But why wait until you have a boxful of memories...start today with an art journal that blends your everyday ephemera with your thoughts and reflections in the present moment.  I've recently picked up a copy of The Journal Junkies Workshop/Visual Ammunition for the Art Addict by Eric M. Scott and David R. Modler.  Its a very basic approach to starting a daily journal that marries the visual image with the written expression - and you don't need to be an artist - you just need to be yourself.


2.28.2011

Simplify, simplify


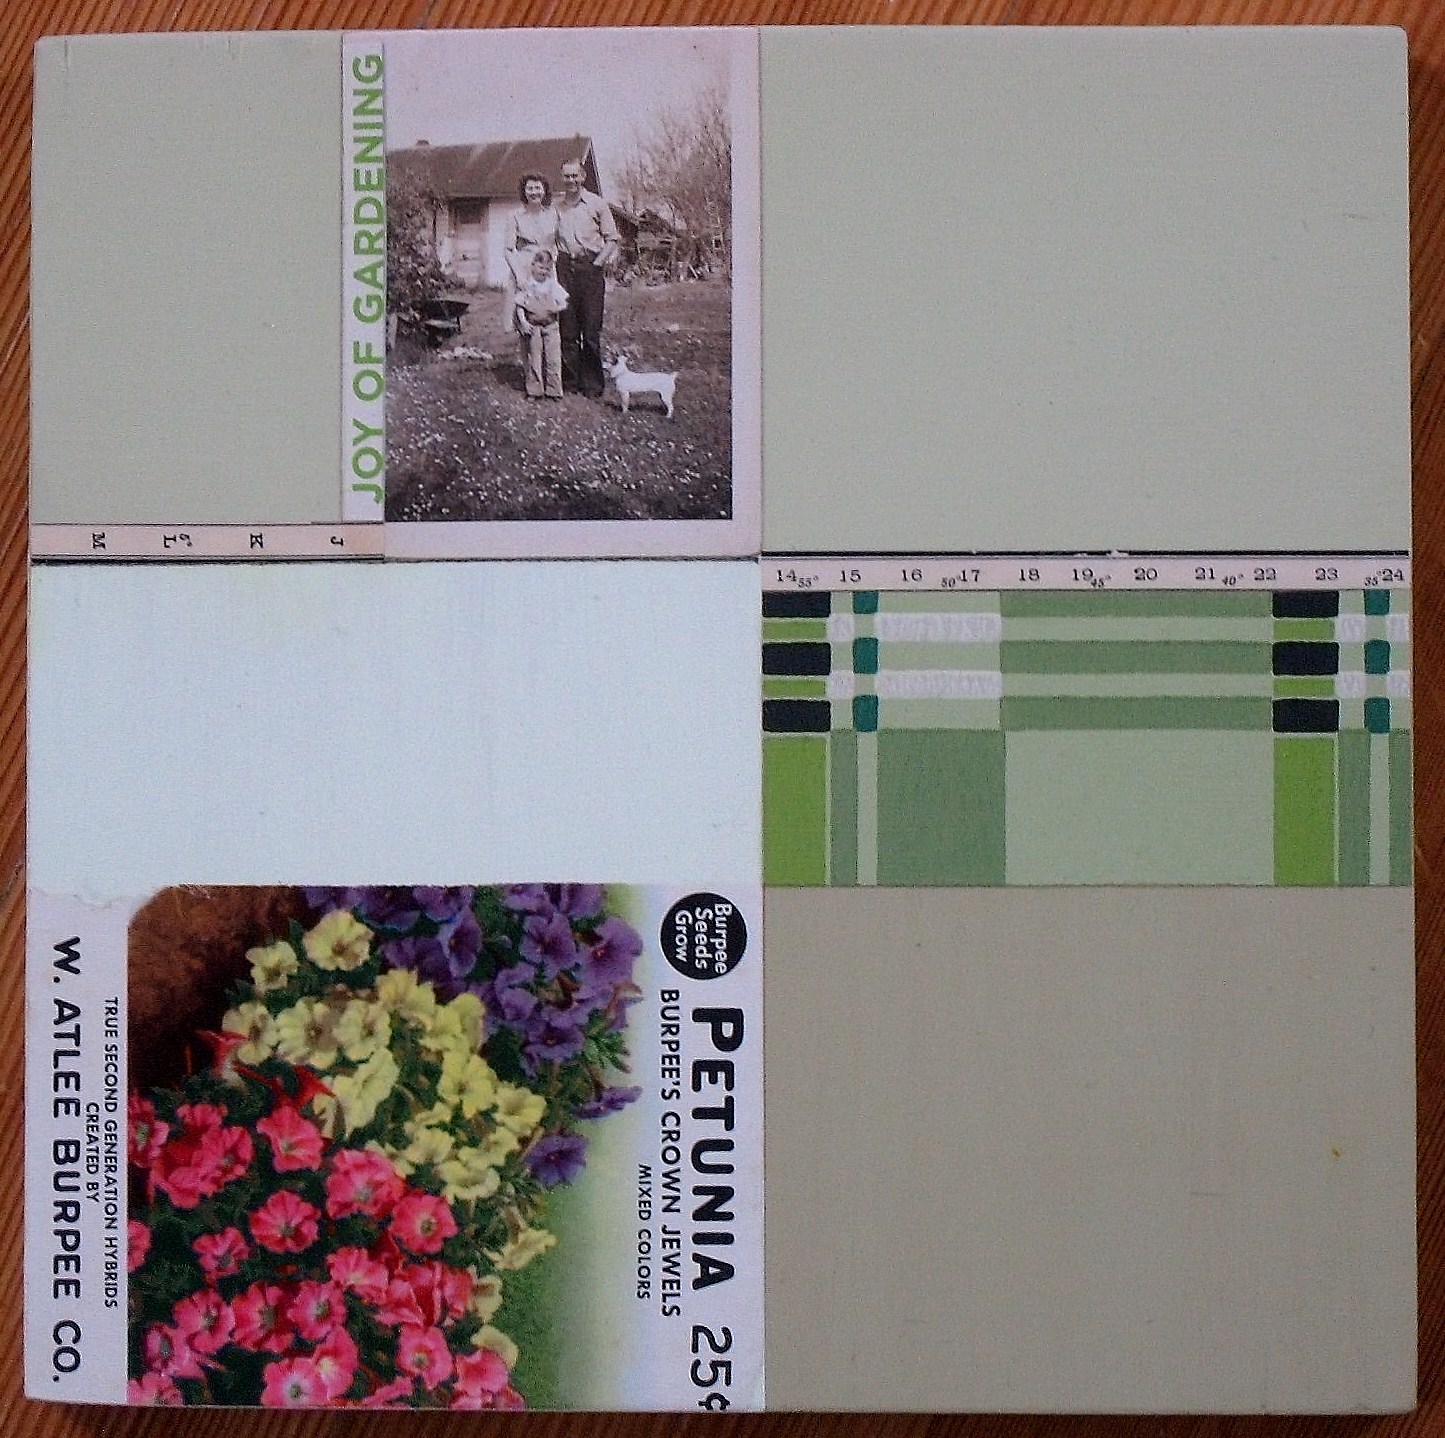
I've started working on a new collage series.  Its a much simpler design - I call it the "3 x 3" series - three color blocks, three pieces of original ephemera, all tied together to tell a story.

I wanted to return to the idea of squares...the origin of my company's name, four corners design, stemmed from my first designs that used a square as its primary graphic element.  If some of you have been following my work for the last ten years, you may remember that my original website used coordinated color squares for the layout.  For some reason, that design element speaks to me...so I wanted to return to squares (and rectangles!)

I also desired to simplify the collage elements...instead of layering elements over one another, I wanted the unique and individual ephemera to stand out.  I have quite a collection of original vintage elements that deserve to shine on their own.  Having found my new love with the gloss medium technique described in my previous post, it seemed the ideal match with this new simplicity.  And continuing my recycled/reuse ethic, I am using scrap pieces of wood for the foundation of each piece.

At the beginning of this post is "worker bee" - its size is 5" x 6" and has a portion of a weekly time sheet from the 1940's.

Here's two more examples from my new series...

"let me have wings" is 8" square and has a book spine from a 1941 novel combined with a bird card from the Arm & Hammer bird series.


"the joy of gardening" is 8" square and features a vintage seed packet with an original old photo and a snippet of vintage wallpaper.
I'm hoping that I'll have these new collages for sale at my re-vamped etsy store...but its proving to be a bit of a challenge to get my old store up and running...but I'll keep you posted when I have the grand re-opening!

2.26.2011

A view from Down Under


My young friend Anna is in Perth, Australia for the next 5 months - she is there with a small group of students from her university.  She started a blog to record her experiences - since she is studying environmental sciences, lots of her impressions are about the flora and fauna of the area as well as other indigenous features...it is fascinating!  I highly recommend that you check it out - I've learned so much about Australia just in the three weeks she has been there.  And its great to get a perspective from much younger eyes - interesting to see what captures her attention...
http://annainperth.blogspot.com

2.23.2011

The Weekly Fluff

There is such an anticipation of spring in the air....


looking for glimpses of green and spring flowers...


But as I drove over to Faded Elegance to fluff my space, there were snowflurries in the air.  It's still February...a little more time to wait...


reflect...


remember...


wish...


and dream about spring days still to come.


For a hit of spring inspiration, visit Faded Elegance in historic downtown Snohomish.

2.21.2011

Beyond auto-focus

I'm not much for new year's resolutions...but I usually make a plan for the year - sometimes detailed (get the studio cleaned up and organized now), sometimes more vague (explore new avenues to showcase my art).  One of the items on this year's plan is to learn how to use my camera to take better pictures.  I was thinking I needed a new camera (and then those funds got diverted into a new computer when the old one was dying) but I think I just need to learn how to more fully utilize (as in "turn off Auto"!) the camera I have.

Stumbled upon the blog Faded Prairie...in additional to lovely images and inspirational ideas, Kristin has a weekly photography challenge.  This week's theme is "Once Loved"...the possibilities for interesting photos just in my house were overwhelming...I went to work...and submitted this photo as my entry.  The gray Pacific Northwest winter makes lighting a challenge...one of many reasons I'm looking forward to spring- better light!


If you want to participate yourself or just see the other fab entries, just click the icon for the link...

2.19.2011

My new love


I'm in love...not with a person or a place...but a process!  Let me explain...

My art friend, Wendy Lee Lynds, is queen of this collage technique that uses gloss acrylic medium for the adhesive in lieu of any type of glue.  She did a fantastic demo of this technique when we collaborated on a booth for the Everett Home & Gift Show in October.  I was fascinated by the technique and have been itching to try it out since then.  We made a plan to get together  - but alas Wendy fell ill...I decided I would give it a shot on my own.

With Wendy's urging, I picked up a copy of Collage - A New Approach by Jonathan Talbot.  Mr. Talbot is the mastermind behind this technique...his book was informative and inspiring.  Watching Wendy's demo helped to solidify the steps of the process...I decided to tweak things a bit since I did not want to buy new art materials (aside from the gloss medium...I had tons of matte medium but its the gloss that does the magic!)

Here is a super-condensed version of what I did...Wendy offers fantastic hands-on workshops and demos on this process...check out her blog for all the info...you really need to learn from the pro!

First-


I gathered an assortment of collage papers/bits/scraps...covered each side with a layer of gloss medium.  Also used the gloss medium to coat a couple of pieces of corrugated cardboard and a mini canvas frame - these would be the foundations to build each collage.  Best to do this step earlier so that everything is dry once you begin.

Next-


I composed my collage and contemplated placement...laid down the first layer of scraps, covered it with the transfer paper and "ironed" it with my quilting iron...since I was working on such small scale (no bigger than 6" square), my quilting iron worked perfectly.  The heat from the iron activates the gloss medium...essentially, the paper is fused to the cardboard.  I purposely extended beyond the edge of the cardboard so I could sand off the excess paper and have a clean edge when completed.


I added a few more elements...it didn't look complete...I remember Wendy mentioning that lightweight elements didn't need to be pre-coated (such as tissue paper or fibers) and could just be added as-is. 

Finally -
A heart formed with vintage package twine was the finishing touch!


Feeling confident, I completed the "Amore King" collage pictured at the top of this post.  I wanted to get a feel how this process would react with different kinds of paper - old book pages, magazine ads, wallpaper scraps...and with old photographs...I have a project in mind for using old vintage photographs - the original print - and wanted to make sure that the surface of the print would not be destroyed by the gloss medium nor the heat of the iron.


Success!  the photo was not harmed by any step of the process.  I can't wait to tackle my next idea...I wonder if gloss medium comes in an economy size...